Posts

How To Make Floating Infinity Shelves

You probably saw these shelves as soon as you entered this website on the home page. Honestly, they’re one of my favorite things that I’ve built. My wife likes books, and I didn’t want regular bookshelves – I wanted them off the ground so I’d have more space in the room for other things. I also wanted something more unique.

I’m going to show you step-by-step how to build these, or something similar. The end-result will depend on the space you have, and what you want it too look like.

Tools

  • Table Saw or Circular Saw
  • Compressor & Pneumatic Brad Nailer (optional)
  • Keyhole saw (or multitool)
  • Paint Brush & Roller
  • Hack Saw (blade)
  • Concrete screws
  • Levels (4ft & 12in)
  • Hammer & Chisel
  • soldering iron (lighter & clothes hanger)

Materials

  • Finished Grade Plywood (½in X 4ft X 8ft)
  • Floating Shelf Brackets (comes with screws)
  • Wood Glue
  • Wood Putty
  • Painter’s Tape
  • White Chalk Paint (optional)
  • Great Stuff Spray Foam
  • Clear Packaging Tape
  • Concrete screws
  • Sandpaper
Skill Intermediate
Cost of (all) Materials $300ish Most expensive is the finished plywood.
Time 3-5 days

Placing the Brackets

To begin, find where on the wall(s) you want to place the shelves.

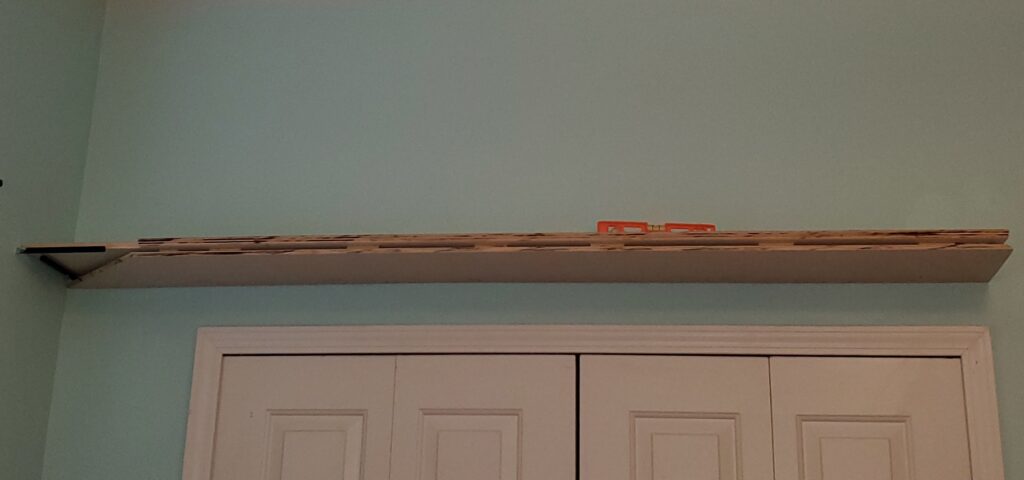
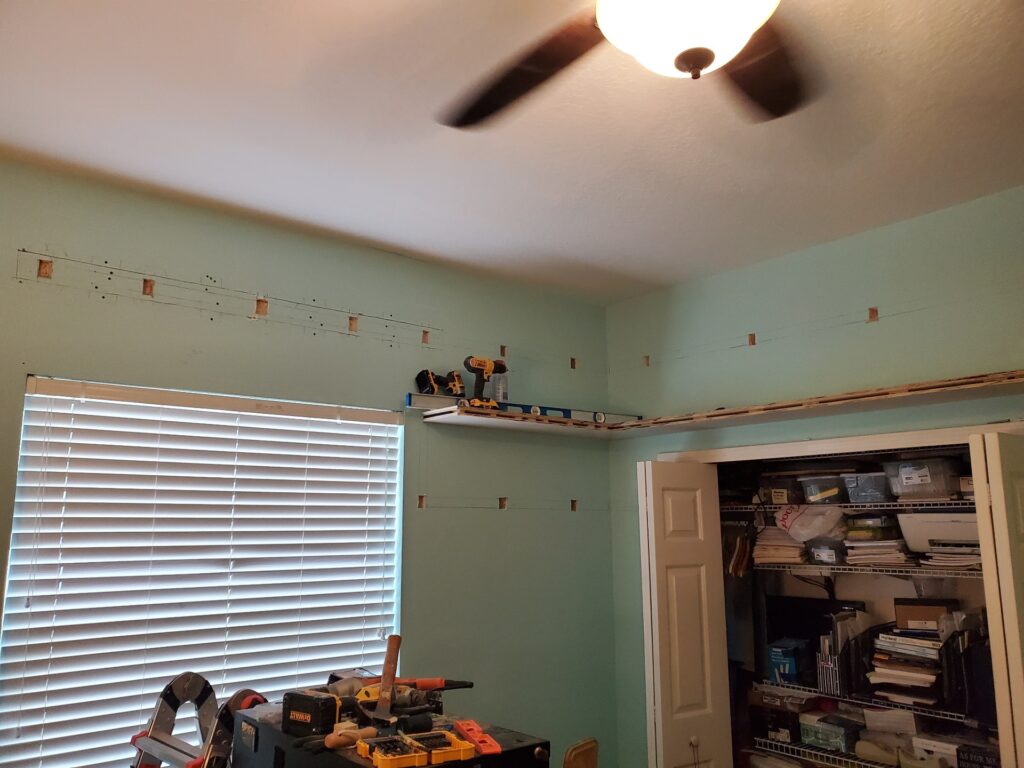
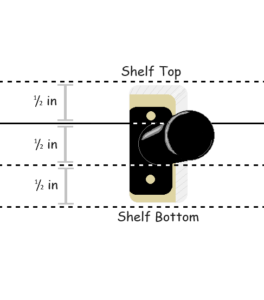
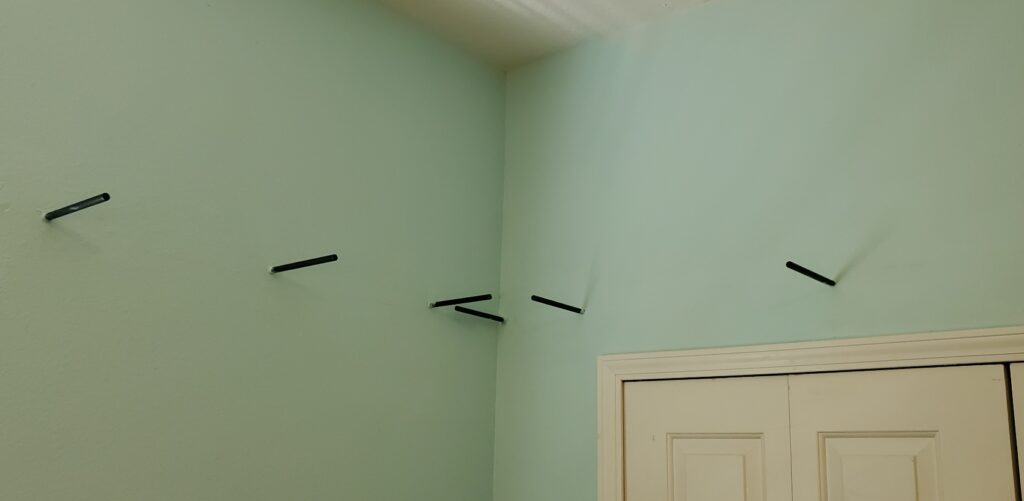
Use a level and draw lines where you want the shelves. The solid line in the picture will be used to place the top of the bracket. The top of the shelf will be ½ inch higher than that line.

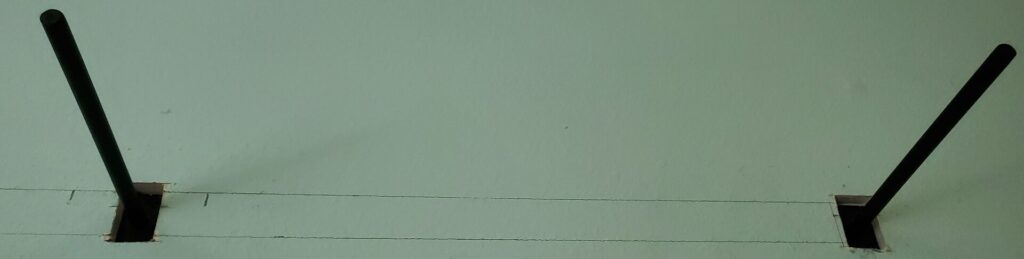
Use a stud finder to find the studs and mark along the line to use as guide.

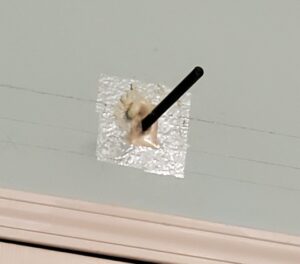
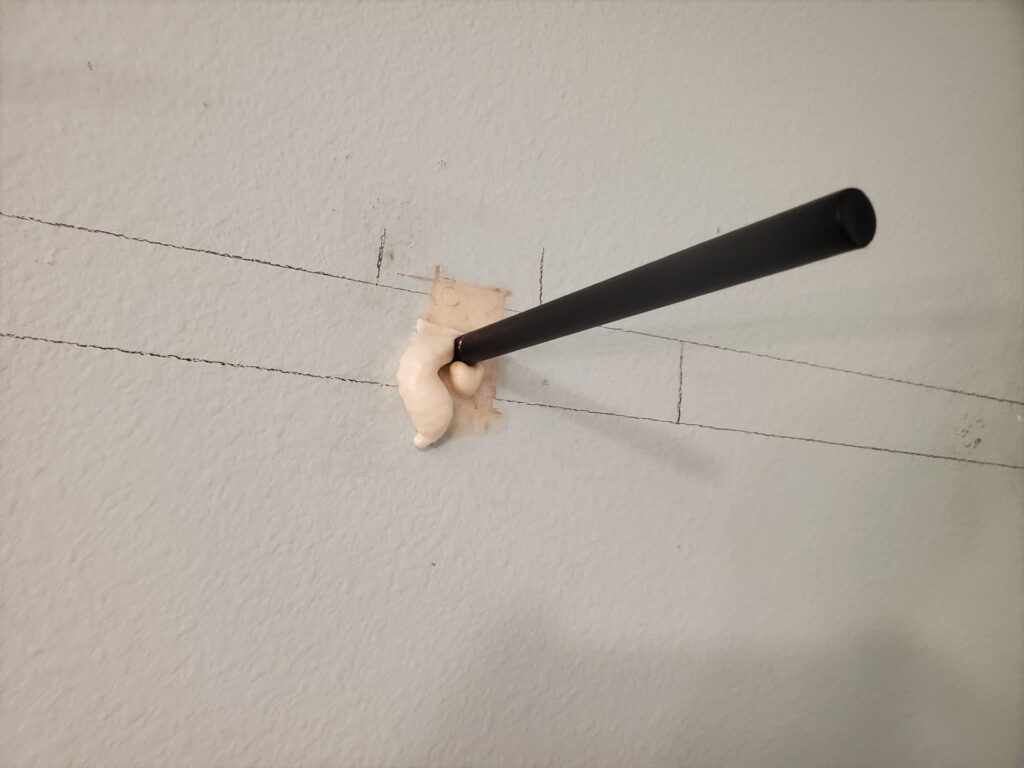
Cut holes big with a keyhole saw (or a multitool) big enough for the base of the bracket to fit, and fasten the brackets directly to stud with a drill and the screws that came with the brackets (much sturdier this way).

Use a mallet to tap brackets up or down to make sure all is level.

After you add your first bracket, use the line you drew and a level to place and install the rest  of the brackets on that tier. Use the mallet to ensure they’re all level

Cover the Drywall Cutouts

Cover around the bracket’s rod with clear packaging tape, and use a soldering iron make a hole big enough for a standard straw to fit through (you can use a lighter and a clothes hanger)

Use Great Stuff spray foam to fill in the cutouts through the melted hole.

Wait for spray foam to dry for several hours.

Take off the tape, and shave off any excess foam with a hacksaw blade.

Sanding and painting drywall

Use compound over the dried spray foam to make it look flush on the wall. Wait several hours for it to dry.

Sand down the dried compound with drywall sandpaper.

Use orange peel spray as necessary for wall texture (this may vary depending on your wall texture)

Paint wall with original wall color (or new if you’re changing) and you’re ready for shelf installation.

Choosing your Plywood

You can get your plywood at most big hardware stores, like Lowes or Home Depot. If you can get it cheaper elsewhere, by all means!

You want to look for finished plywood, which means it’s meant for furniture grade items, not construction material. This is the most expensive part of this product, because depending on how many shelves you want to build, you’re going to need more wood.

For our purposes, 2 -3 sheets should work just fine. Use this diagram to determine how much you need. 

Each shelf will at least have a top board, a bottom board, and an edge piece (excluding any side end pieces for now). 

You can use S1, S2, and E1 to make one length of shelf at least 8 feet long. E1 – E4 will be used for the outside edges to close the gap between top and bottom pieces. 

We’re also not going to be wasting any of this wood. We’ll be using any extra as support in between the two large pieces.

Cutting the Plywood

I cut my shelves to a depth of 10 inches, which is what I would recommend. But if you need it to be deeper, an inch or two more wouldn’t hurt. Just make sure you get the brackets long enough to hold the extra depth. I used 8-inch brackets.

Use a table saw (or circular saw) to cut your 8’x4’x½” sheet of plywood and cut out several sections of 10-inch-wide planks. (Leave some room to make the end pieces).

One side should be cut at a 90-degree angle, the other should be at 46 degrees (1 extra degree past 45 to give space when you’re gluing together)

Making the End Pieces

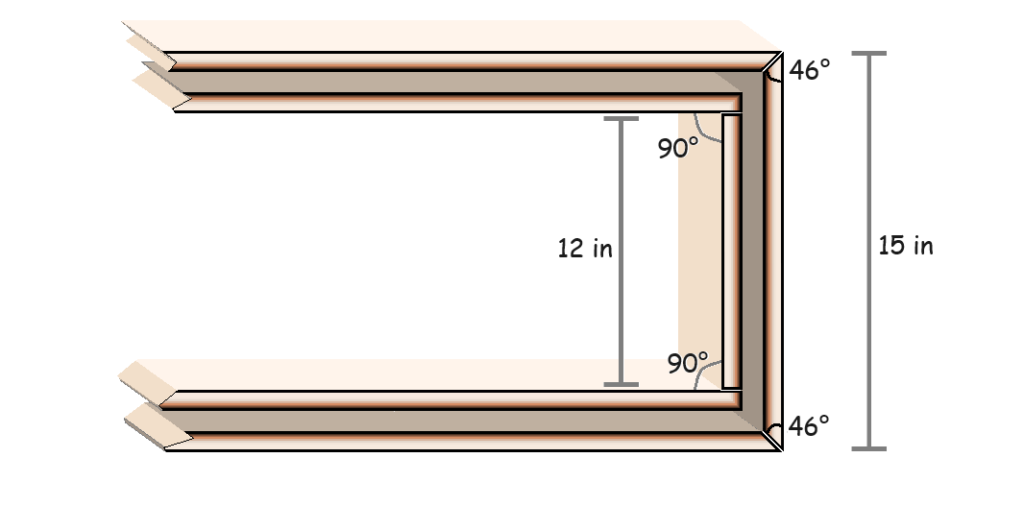
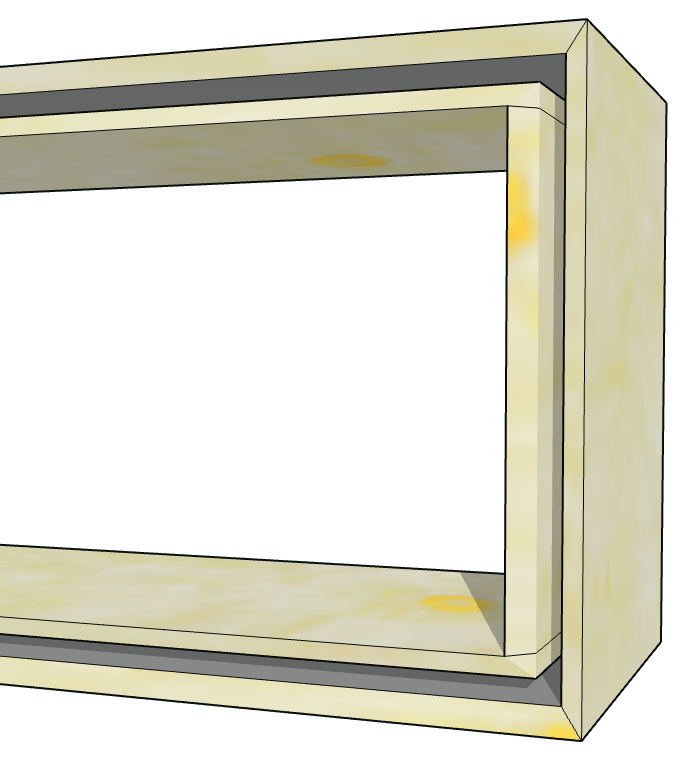
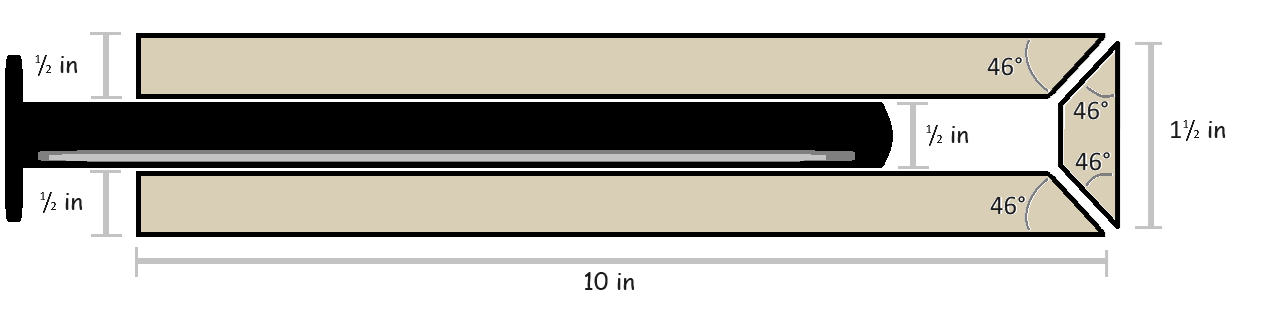
The shelves will be 1½ inches thick. So, the end piece needs to be 1½ inches thick on the outside edge. 

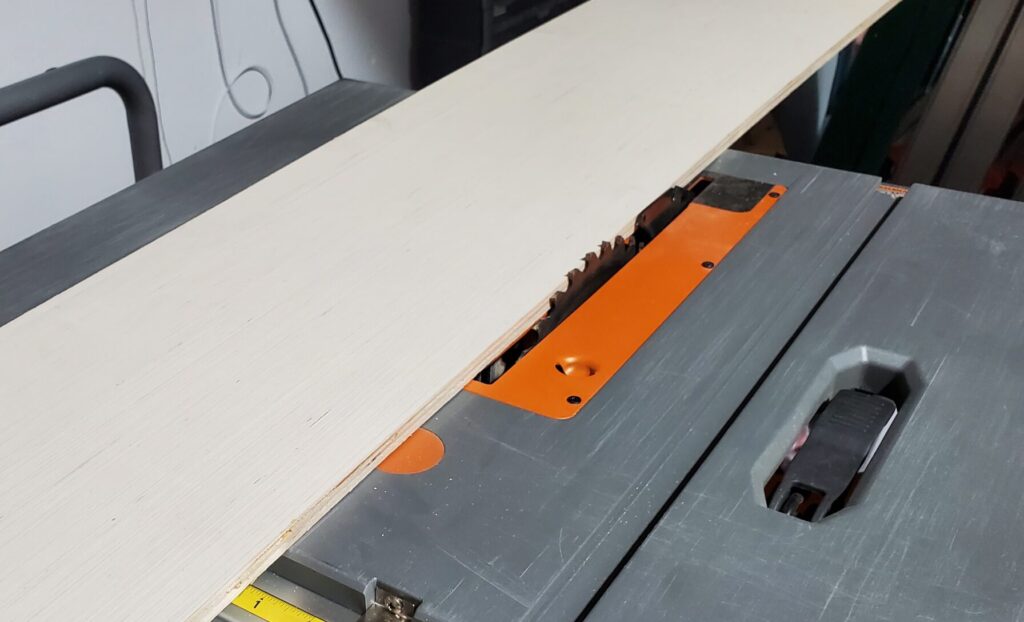
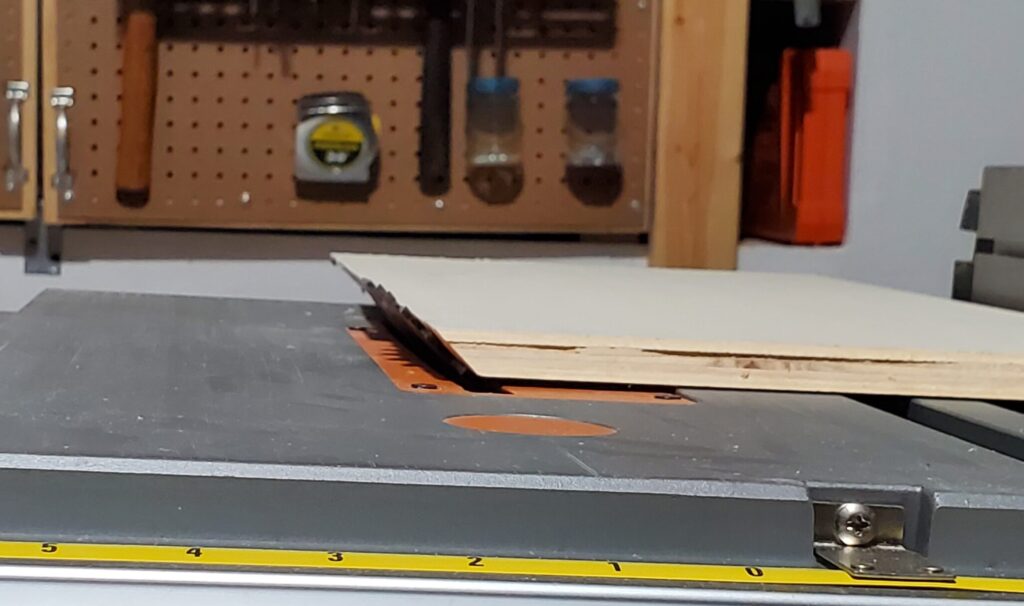
Use a table saw (or circular saw) cut the two inner sides at 46 degrees so it can resemble a flat top triangle shape.

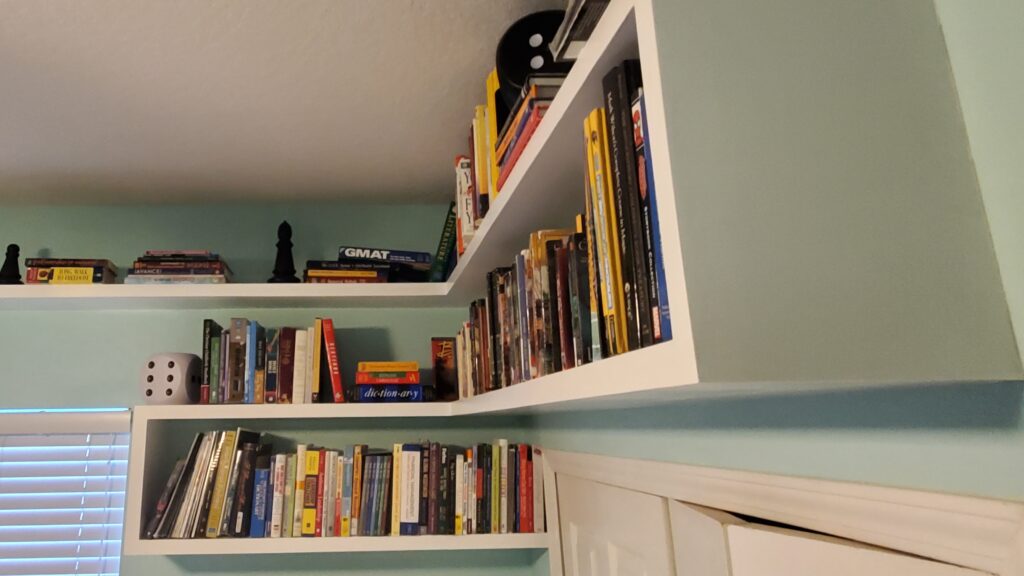
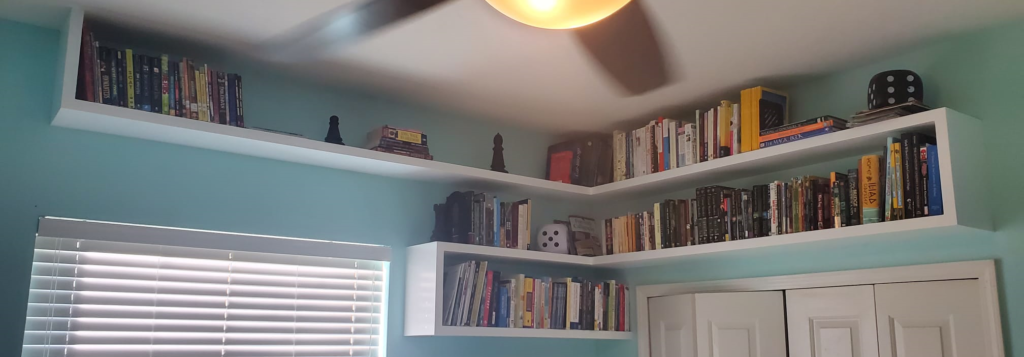
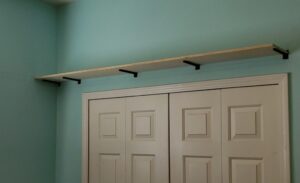
When you put all pieces together, you should have the basic form of the shelf that will fit into the brackets on the wall. This is what the end product will look like

Joining Top and Bottom

Place a shelf piece on top of the brackets.

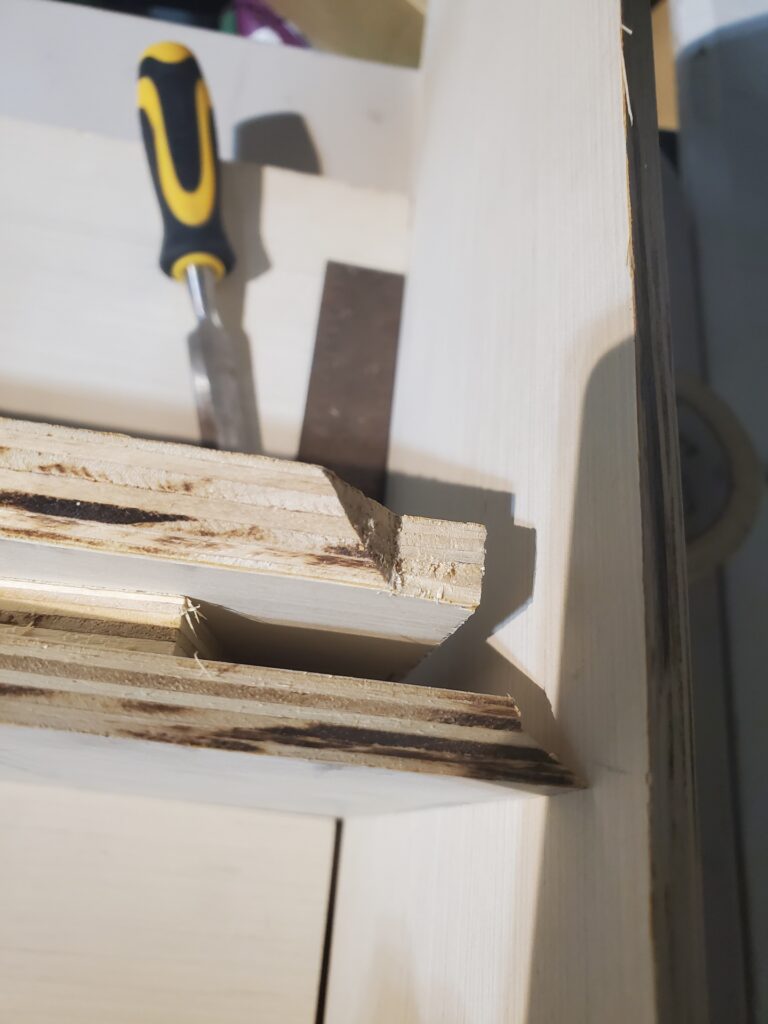
Trace around the brackets. (see dotted lines in picture below)

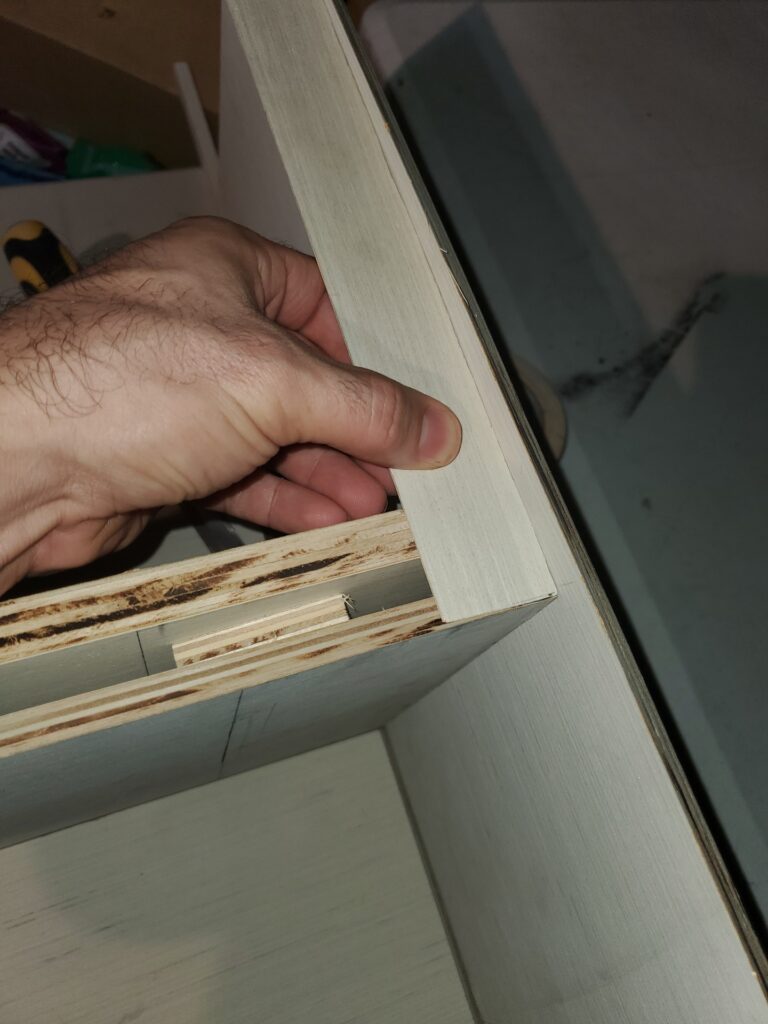
Glue scrap pieces of the half-inch finished plywood (at least 2in X in”) as spacers. Avoid the spaces where the brackets will go. You can use a brad nail gun with ⅝ brads in addition to the glue (optional but makes the process faster).

Use longer scrap pieces at the ends with ¼ inch holes drilled through the long non-finished end. Glue this closer to the edge that touches the wall. This will be used later to fasten the shelf to the wall so there’s no play.

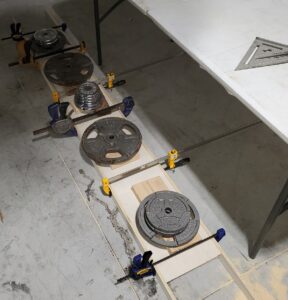
Ideally, you will have a table and enough clamps to put pieces together. If you don’t, use what’s available. I have several clamps, and I used my weights, which worked just fine. 

(ignore the stained garage floor, that’s another project)

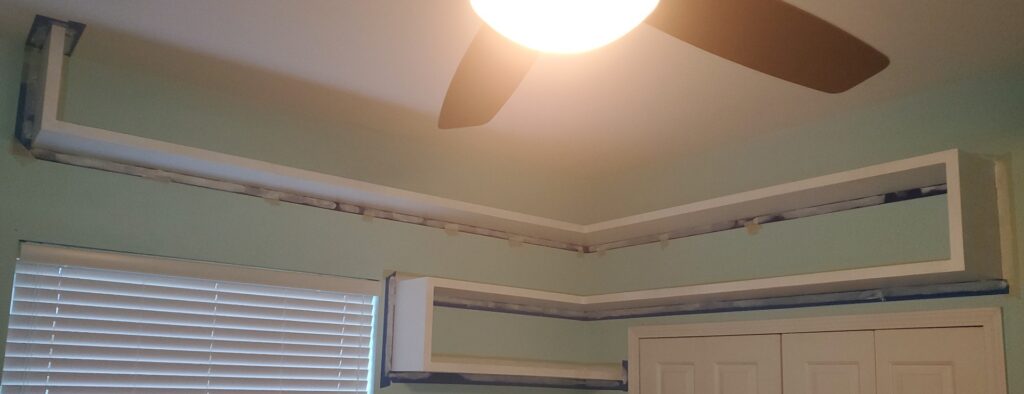
With this first piece, I joined the pieces prior and slid onto the brackets. For the following shelves, if you’re going around corners, it will be easier to clamp the pieces together in their final resting place.

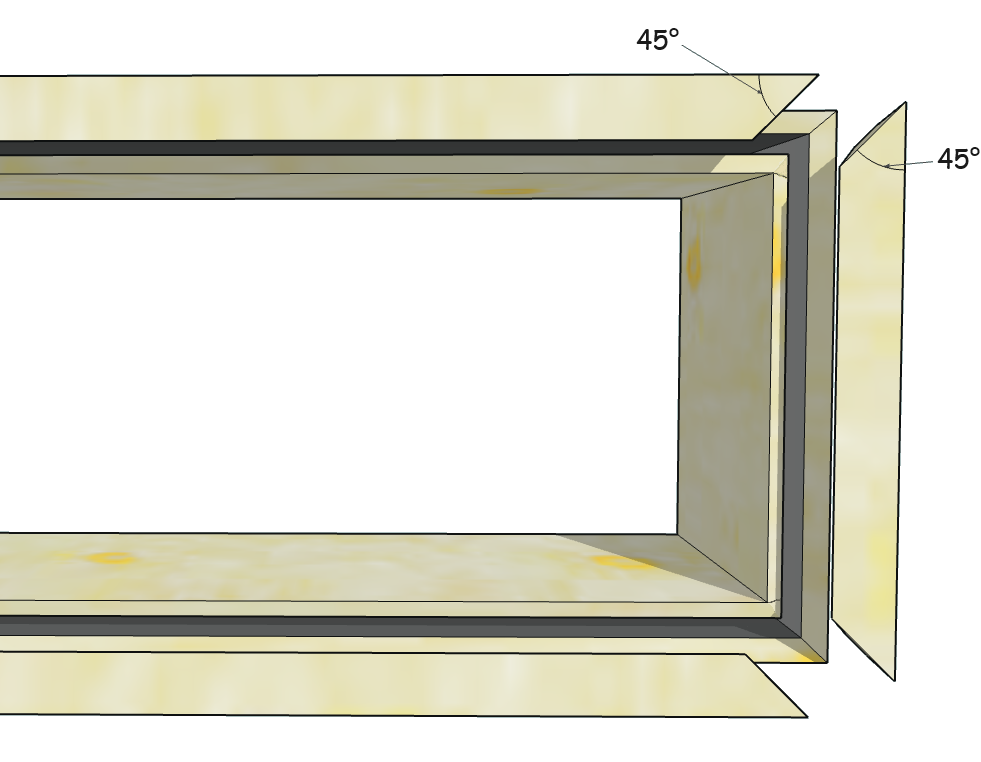
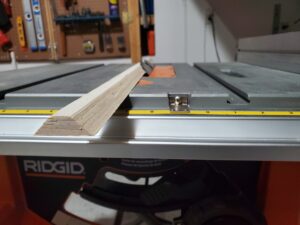
You’ll notice that the bottom left is cut at a 45 degree angle. This helps the separate shelves stay together and adds strength because they’ll overlap each other at the brackets. 

However, the overlap doesn’t have to be at 45 degrees – I chose this for aesthetic purposes. The top is also cut, but at 90 degrees.

Continue the same process wherever you choose to add more shelves. 

At this point, we’ve only added on the top and bottom pieces of the shelves. We’ll leave the smaller edge pieces until the very end.

*Note – if you’re working with an exterior wall made of concrete blocks, you might have to use concrete screws.

The Vertical Pieces

What stands out about these shelves, is that the tiers are connected by vertical pieces. It’s a continuous shelf.

These vertical pieces are easy to add. Once you have all the shelves up, measure the corresponding ends, top to bottom, on the outside, and top to bottom on the inside. I made my shelves 12 inches apart. That made the outside piece 15 inches, and the inside piece 12 inches.

Cut the outside piece with a 46-degree angle at each end to match the cut of the horizontal shelves. The inside can be cut at 90 degrees.

Adding the Edges

Now that you have all the main pieces up, we can add the smaller outside edges. You can measure and cut to the length you need.

At the ends, where the horizontal shelves meet the vertical pieces, you just added, you’ll have to use a chisel to carve out a 46-degree angle. This way every single edge is ready to have the pre-cut edge pieces glued on.

There are different ways to do this, but I chose to cut each edge piece at 45° for a cleaner look.

Next, add the end pieces to all the shelves, and you finally have all the pieces needed. It’s a good idea to test fit before using wood glue. 

Once all pieces are dry fitted, use painter’s tape to hold the pieces on.

Use clamps to evenly bring pieces closer together where necessary.

When dry, use wood putty to cover any gaps, and sand once dry.

Finishing Touches

Next, use painter’s tape on the walls and paint the shelves the color you want, or use stain. Otherwise, you could just leave the wood grain and use a varnish. There are many different things you can do; it all depends on the look you want.

I chose to paint the shelves white to match the rest of the furniture in the room

The Final Product

Leave a Comment

Your email address will not be published. Required fields are marked *